‘…it contains all the functions I could think of and many more which are extremely useful…’.
Rich featured biomedical image analysis software.
| Supported Image Formats | Analyze 7.5, TIF, DICOM, PNP |
| Requirements | Windows, Unix, Linux or MAC OS (new) with IDL RT 6.1 or higher |
| Origin, Copyright | Novartis |
| Author | Martin Rausch, MSI additions by Markus Stoeckli |
| Download | Including VM Win x64 (recommended): biomap3804win64.zip (290 MB) Including VM Win x32: biomap3804win32.zip (270 MB) Including VM Linux: biomap3804linux.zip (290 MB) Including VM Mac: biomap3804mac.zip (334 MB) Without VM: BioMap3804.zip (6 MB) Update from 3.8.x.x: BioMap3804Update.zip (3 MB) |
| Demo Data | BioMapDemoData.zip (1 MB) |
| Registration | Online |
Description
With the development of the MALDI Mass Spectrometric Imaging Technology the availability of a powerful processing and displaying software became a crucial factor. With BioMap we have now a tool available which was originally developed for the evaluation of MRI data in biomedical research. It was modified over the years (1996 till now) to support many more imaging modalities, including optical, PET, CT, NIRF and MSI.
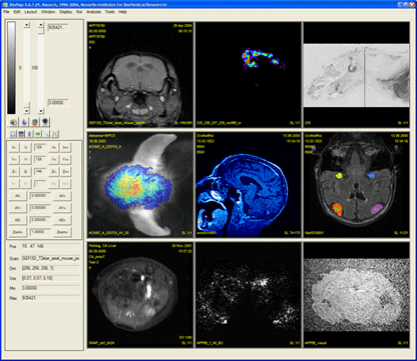
BioMap was written in IDL™. It provides a common visualization and storage platform, which can be used for visualization of data from any source, provided that an import filter exists for this format. This platform can be extended by various software packages, individually designed for analysis of specific data sets. Visualization is based on multi-planar reconstruction allowing extraction of arbitrary slices from a 3D-volume. Other features linked to visualization are overlying of two individual data sets or displaying of ROIs. BioMap uses a 4-dimensional representation of imaging data. The first three dimensions are used for describing the position of a voxel in space, the fourth dimension is reserved for independent parameters such as time, mass, wavelength or diffusion weighting. In addition to the voxel data, a header is used to store information for scan identification, the physical position of the object in space (important for co-registration of multiple scans) or the imaging protocol. Image data can be imported from several sources. Processed data, however, will always be stored in Analyze-format. This format was used since it is widely distributed and can be loaded by several other tools, like ANALYZE (Mayo clinics) or SPM (Welcome department of cognitive neurology, London). BioMap comprises all tools, which are required to process single-subject-data, to combine results from several subjects or sessions and to document the final result of a study. Import and export of partially processed data to other software-tools can therefore be avoided.
Setup
BioMap is based on IDL and need the installation of the IDL Virtual Machine (IDL VM) on the same computer. The IDL VM is a free runtime version of IDL that can execute IDL ‘.sav’ files without an IDL license. It runs on all IDL-supported platforms and does not require a license to run.
Note that the IDL Virtual Machine requires installation of the full development version of IDL; however, an IDL license is not required to run the Virtual Machine. During the installation you may skip the installation of the license manager.
All systems
- Unzip the files from the downloaded archive to a temporary directory on your computer and install the IDL VM from the corresponding sub-directory.
Windows
- Change to the BioMap sub-directory
- Execute ‘install-win.bat’ as administrator (right-mouse click, Run As…) which will assist you in installing the program files and settings.
- Create a shortcut to ‘biomap.sav’ (typically localized in ‘C:\Program Files\BioMap\bin’) on the desktop and execute BioMap by double-clicking on this shortcut.
Unix and MAC OS
- Extract all the files from the BioMap sub-directory to the directory ‘/usr/local/biomap’ while maintaining the subdirectory structure.
- Execute ‘install-settings-linux-mac.sh’ which will copy the default setting files located in the ‘settings’ subdirectory to a directory ‘.biomap’ created in the home folder. If you choose a different folder for the biomap installation, open the file ‘uparsrc’ in the ‘~/.biomap/’ directory with a text editor and edit the line beginning with ‘BIOMAPDIR = ‘ to reflect the location of the BioMap installation.
- Start BioMap by executing the script ‘biomap.sh’.
All systems
- If this is the first installation on a computer, its ID will be displayed in the startup window. Use this ID to get the matching license key from https://www.ms-imaging.org. An email will be sent to you with the registration key specific for each computer. Enter this key and re-start BioMap.The registration mail also contains the file ‘licenserc’ as an attachment which you can use for manual installation (attention, this step is only required if above registration failed). Save this file to the program or user directory (e.g. C:\Program Files\BioMap or C:\Documents and Settings\Administrator\Application Data\BioMap) to license your application.If your spam filter did not allow for this attachment to pass, manually create a file with the name ‘licenserc’ (no extension) in the program or user directory (e.g. C:\Program Files\BioMap or C:\Documents and Settings\Administrator\Application Data\BioMap). The file must contain the 6 lines similar toTYPE = 82
ID = 355904
EXP = 53029710
MRI = 57301911
MSI = 34001879
WIP = 23538809 - Restart BioMap and the license will be loaded.
- In BioMap, use Edit-Defaults to select your directories.
- Report problems to the forum at https://www.ms-imaging.org, this is the only way to obtain support.
Documentation, Training
BioMap contains an extremely rich function set which is only partly described in the manual. There are many ‘tricks’ which are not obvious to first-time users. We suggest that you learn from your colleagues or that you check the forum for training opportunities.
Tutorials
Short movies demonstrating MSI data analysis with BioMap: